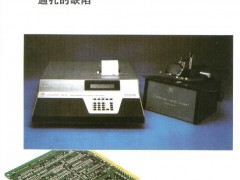
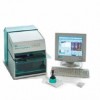
CAVIDRM of CD-8 Can print out the data and the histogram of the measurement results, and have the prompts, making testing easier and faster through-hole.
New CD-8 With the 10 permanent memory greatly increased its testing capabilities. In addition, according to the operation tips, even in the absence of trained personnel capable of operating.
CD-8 Can be 2 lines, 20 the size of the LCD screen on the precise unit of measurement to mm inches, microns, micro Agam (these units can instantly convert between imperial and metric), built-in alphanumeric printer can be a permanent record of all test data, statistical tables (mean, standard deviation, error percentage) and the histogram. And its RS-232C port connected to the computer.
Easy to operate. Input circuit board thickness and hole diameter (mm inch or mm), followed by measurement. Since CD-8 With the automatic adjustment function, they are able to immediately convert the value of copper resistance precise hole copper thickness of the test value.
CD-8 Display help for difficult test: Enter the minimum acceptable thickness of copper, in addition to accurately measure the thickness of tolerance for those below the minimum value of the thickness of the copper hole, CD-8 Can display and print out the "less than the tolerance" message. Copper holes encountered bad, it will issue the songs and displayed.
Can test the value of the minimum thickness of 25 mm inches (0.62mm), or even an accurate measure of a tin coating layer.
CD-8 Advantages:
l directly show the thickness reading (Imperial or metric units), no tables, results, or slide rule
l have 10 permanent memory, can store hole size, thickness and the minimum copper thickness range of values
l accurate measurement of the thickness of copper plating, copper plating and even chemical, electrolytic copper plating, or even a tin or gold plating of copper Coating
l Built-in printer can print out all data and histogram
l 2 rows wide, 20 long LCD screen
l be able to immediately decide whether to treat measurement location can be measured
l measured from the surface of pad size of
Surface l - probe mode can be directly measured copper coating / epoxy coating thickness
l especially suitable for quality control, incoming inspection, laboratory work or production test
l can be detected copper hole defects such as insufficient plating, cracks, hollow and non-continuous
l eliminates the high cost and time-consuming measurements and destructive desktop Block slice measurement
Principle of operation
CD-8 Is the measuring principle according to four o'clock resistance testing.
DC pulse sent to the conical tip on the probe, and probe pulses evenly then transfer these measurements to the hole in the copper layer. The voltage sensor probe contactor to drop in flow through the copper pillar surface voltage, then their feedback to CD-8 . CD-8 Calculate the resistor values, converted into thickness values, and displays it.
Caviderm probe by the following instruments and the protection of U.S. Patent No.: 4,245,189; 4,042,880; 3,885,215.


